

Career Page
A career page is the public site your company publishes. It is opened under Career Page, where Preview, Versions, Consent Manager and Domains sit alongside each other.
A career page is built in versions, and exactly one version is published at a time. Visitors only see a change when you publish another version, so you can build the next one while the current one stays live. The page shows your published job openings and the application form visitors fill in.
Relations
- Job opening — published job openings are shown on the career page.
- Application — the form on the page creates them.
- Consent manager — the cookie banner on the page, published separately.
- Domain — the web address of the page. You can add several, but only one verified domain is active at a time.
- Dashboard — the page's visits are counted on the Traffic tab.
Checking your setup
The Preview tab opens with a Setup panel that shows three things and whether each is done.
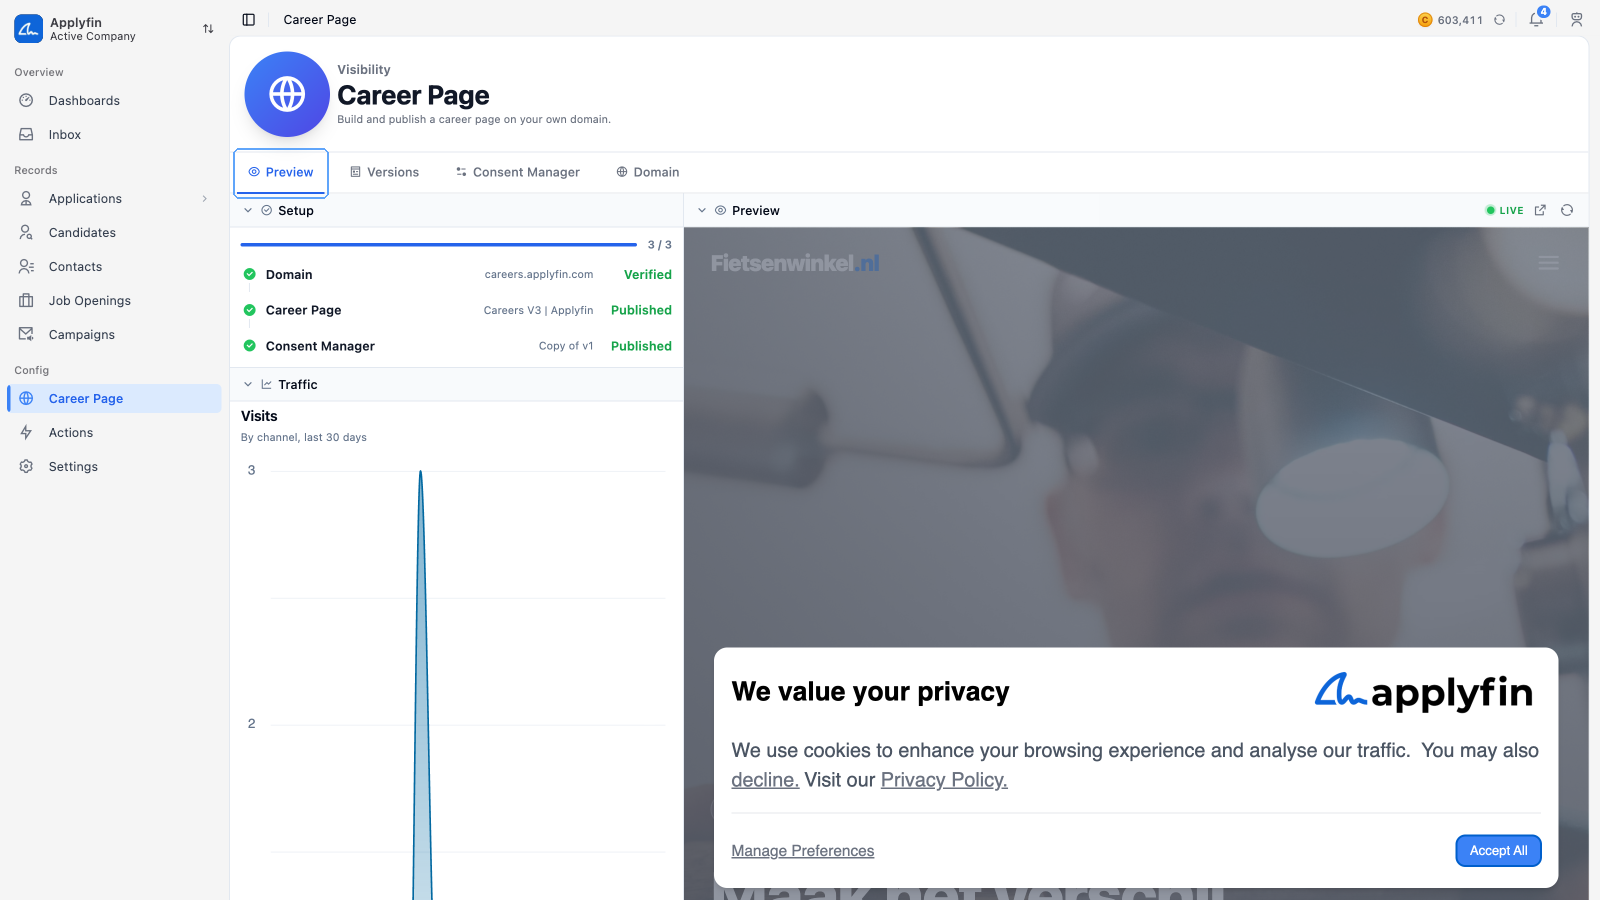
- Domain — Active or Unset.
- Career page — Published or Draft.
- Consent manager — Published or Draft.
Select a row to open the tab where that step is managed. Below the checklist, Metrics lists the last 30 days: visits, actions, actions per visit, the most actions in one visit, average time on page, bounce rate, applications, conversion rate and each goal's conversions. Every row shows the change against the 30 days before.
The page itself sits on the left, the Setup panel on the right. The bar above it switches between Desktop and Mobile width, and shows your domain with buttons to reload the page after publishing a new version or open it in a new tab. Until a domain is active and a version is published, it reads Nothing to preview yet.
Creating a version
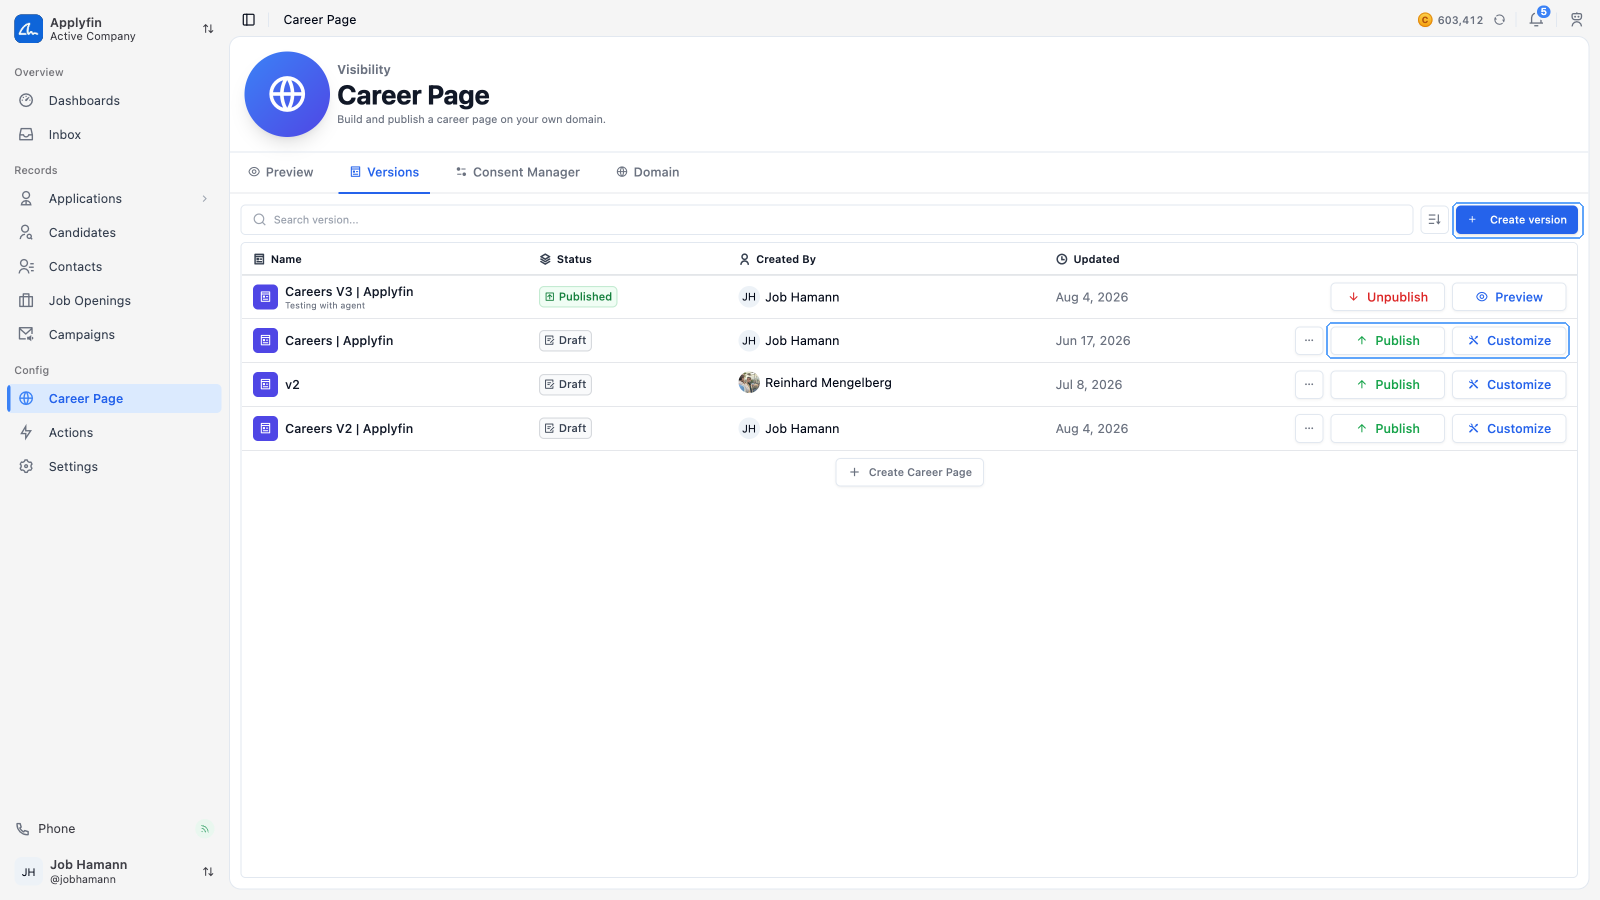
To build a career page, create a version of it.
- Open Career Page and select Versions.
- Select Create version.
- On Template, pick Blank Template or Copy from Source.
- For a copy, pick the career page to copy on Source.
- On Details, fill in the Version Name and a Description.
- On Theme, check the colors: Primary Color and Secondary Color for your brand, Primary Text Color for headings and Secondary Text Color for body text. A blank version starts with the company theme; a copy starts with its source's theme.
- Pick the Heading Fonts, Default Fonts and Mono Fonts. Your uploaded fonts come first, then every family on Google Fonts. Search by name; each option is shown in its own typeface.
- Select Create Career Page.
The version appears in the list as Draft.
Building a version
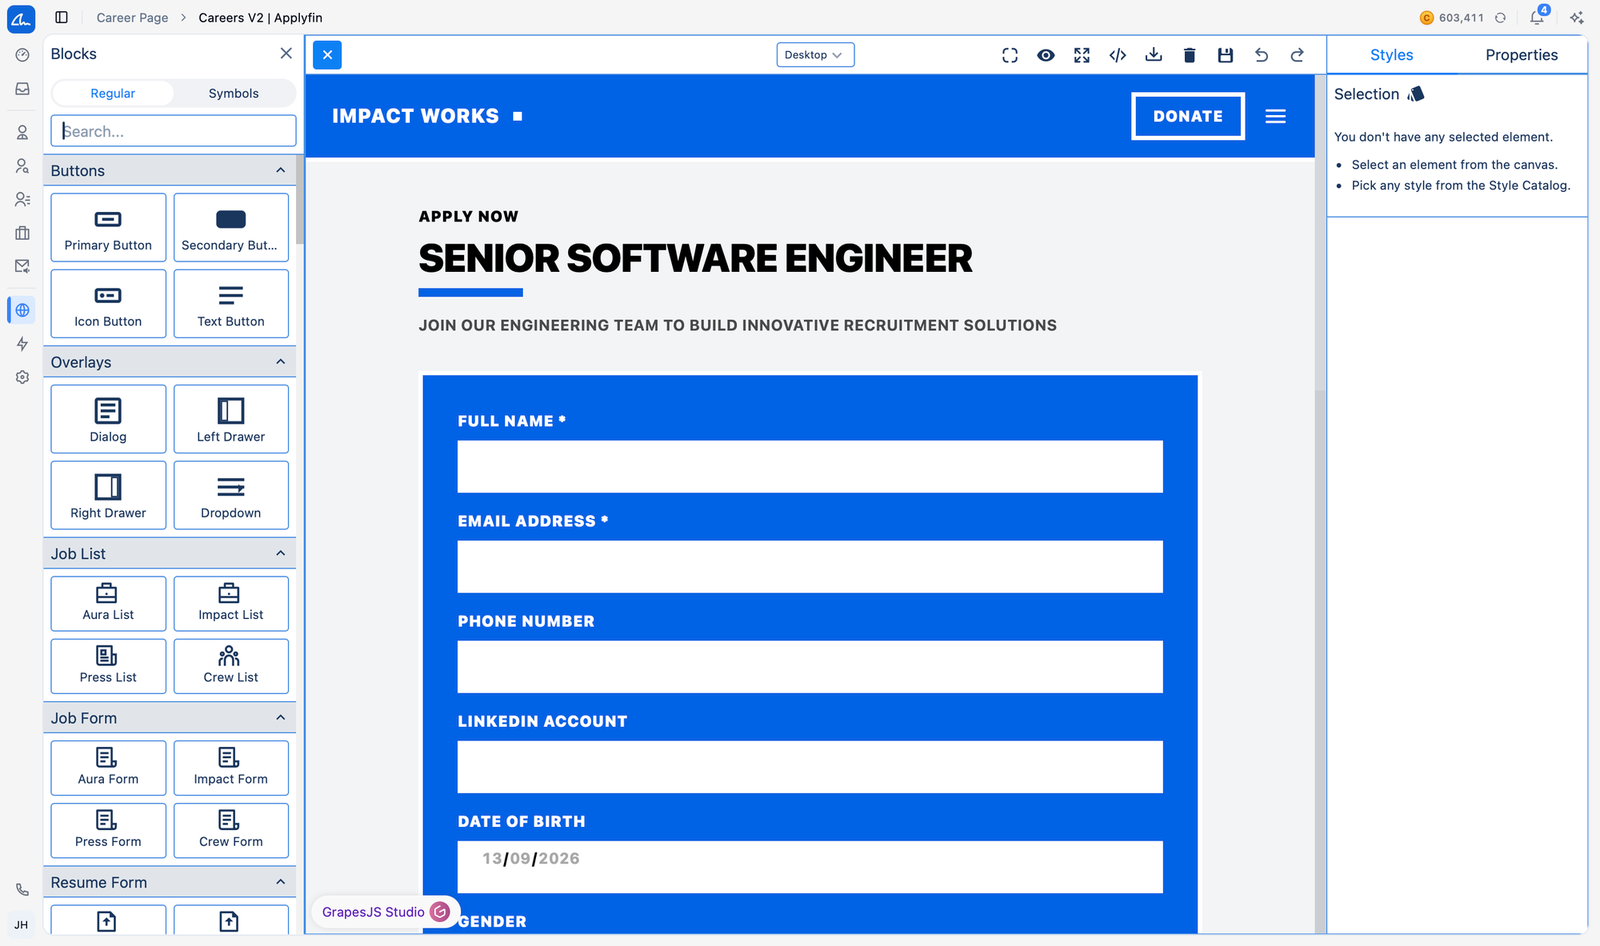
To design the page itself, open the builder.
- On Versions, select Edit on the version. The builder opens.
- Pick a page under Pages on the left. Its elements are listed under Layers.
- Select Add layer (the plus next to Layers) and drag a block onto the page.
- Select an element on the canvas or in Layers to change it on the right: Styles for its look, Properties for its settings and data, Advanced for its classes.
The builder saves on its own as you work, and when you leave the page. Select Save at the top right to save at once. The buttons next to undo and redo show the page at desktop, tablet and mobile width. A width that doesn't fit next to the open panels is scaled down to fit.
To see the page without the builder around it, select Preview (the eye after the width buttons). The panels and the toolbar hide and nothing on the page can be selected. Select Exit preview at the top left, or press Esc, to go back to editing.
The page's scripts, such as menus, drawers and carousels, don't run in the builder until you select Run scripts (the play button at the end of the width buttons and code buttons) and confirm. Select it again (now a stop button) to stop them. Elements that only show when a script opens them stay hidden while scripts are off: select them under Layers. Turning scripts on or off reloads the canvas and clears undo. Opening an agent's draft turns scripts off: select Run scripts again to try the draft's menus and carousels before you commit it. On the published site they always run.
To work on the page as code, select Edit code (the code icon after the width buttons). It shows the page's HTML. Change it, or paste in a design you already have, and select Apply. Style elements with Tailwind classes. Script tags in the HTML are left out: write your JavaScript as scripts instead.
Scripts and stylesheets
Scripts are files of your own JavaScript, such as a carousel or a 3D scene, and stylesheets files of your own CSS, such as an animation, that pages load.
- Select Scripts (the JS button) or Stylesheets (the CSS button), right of Edit code, and then New script or New stylesheet. A new file is loaded on the page you're on.
- Type its name and press Enter. The
.jsor.cssafter it is fixed. - Write the code on the right and select Apply.
A script runs at the end of the body unless you choose otherwise: open the menu (⋯) on the script, then Runs, and pick the head, the start of the body or the end of the body. At the end of the body, the page's elements are there for the script to use. The same menu has Rename (or double-click the name) and Delete; a stylesheet's menu has those two. Nothing changes until you select Apply.
A stylesheet loads after the page's own styles, so it can override them, and shows in the builder straight away.
To choose which pages load a file, pick it under Resources → Scripts or Stylesheets in the settings: in Site settings for every page, in a page's Page settings for that page only. A page loads the site's files first, then its own, in the order listed. Renaming or deleting a file updates every page that loads it.
Alpine, which runs menus and other interactive elements, starts after every script. To add your own Alpine component or store, register it when Alpine starts:
document.addEventListener('alpine:init', () => {
  Alpine.data('carousel', () => ({
    init() {},
  }));
});
Then use it on an element with x-data="carousel".
A script that starts with import runs as a module. It can import the
packages the version has turned on, by their name:
import * as THREE from 'three';
import { GLTFLoader } from 'three/addons/loaders/GLTFLoader.js';
A module always runs once the page has loaded, wherever it is placed, and what
it declares stays inside it: share something with other scripts or elements
through window, Alpine.data or Alpine.store. Scripts only run in the
builder while Run scripts is on; applying changes then reloads the canvas
with them.
To add a page, select the plus next to Pages. The settings button on a page
opens its Page settings: under Page its name, type and Slug (its
address; a page without one is the home page, at /), under Resources
its Stores, Scripts and Stylesheets, under SEO the title, description and keywords search engines
show, and under Social sharing what a shared link shows. An empty field uses
the site's value, shown in grey.
The site's values are under Site settings, the settings button next to Pages: the SEO and social sharing every page uses unless it sets its own, and the scripts and stylesheets every page loads. The site's title is also the name of the site. To switch to another page or the site while the settings are open, pick it from the title at the top.
A page that shows one job opening, such as the page a job list links to, is a template.
- Open the page's Page settings.
- Set Type to Template and Model to Job opening.
The page is then shown for every published job opening, at its slug followed by
the job's slug (/job/senior-developer), and its elements can use the job's
data in Data. Only a template page can use it.
Stores are the live data a page can use, such as the job list or the application form. Pick them under Page settings → Resources, on a page of either type: the Data section offers only the stores the page has picked. An element that needs a store, such as a Job List block, picks it for you when you add it to the page: dropped, pasted or duplicated. If a page still uses a store you removed, its settings say so.
On a template, the SEO and Social sharing texts can include the job's
details. Select the braces at the end of a field and pick one, such as
{jobOpening.title} or {jobOpening.location.name}: a title like
{jobOpening.title} in {jobOpening.location.name} reads "Developer in
Amsterdam" on that job's page. A field left without them is filled from the job
as before.
Adding packages
Packages are ready-made libraries your pages can use, such as a carousel or animations. Pick them from the list; you can't add your own.
- Go to Career Page.
- Open the menu (...) on a draft version and select Packages.
- Turn on the packages your pages use and select Save. Select the info button next to a package to see what it does.
Every page of the version loads them. In the builder, a package's styles show right away; its scripts run only once you turn Run scripts on. Reopen the builder after changing packages to see them there.
Asking the agent
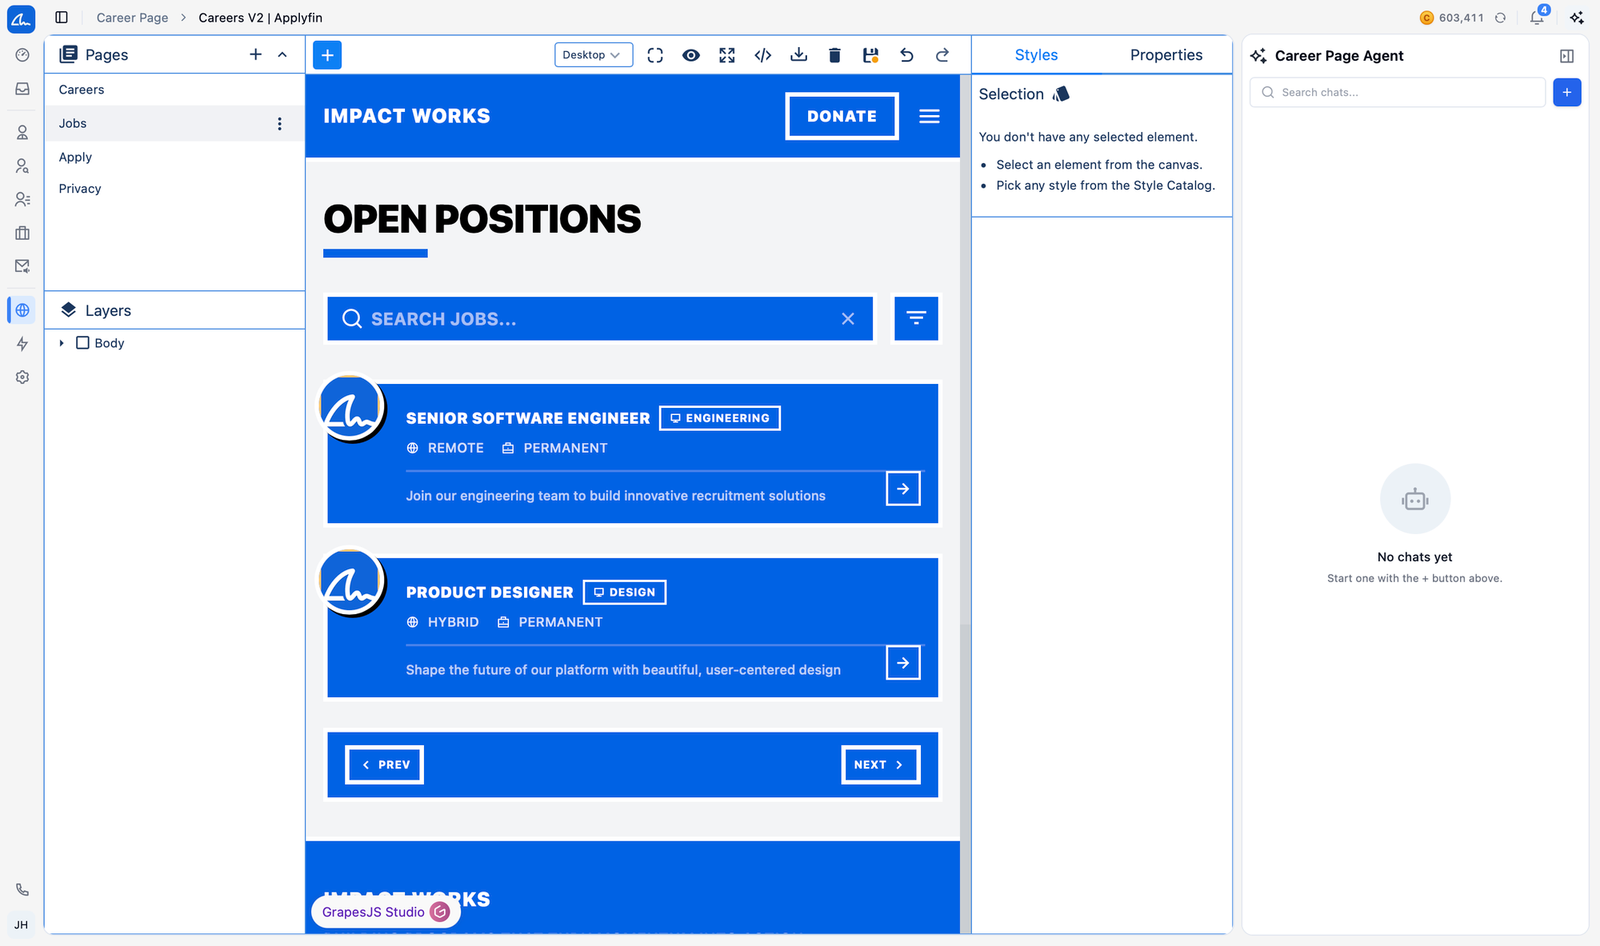
The builder has its own AI agent, in a panel called Career Page Agent.
To change the page without moving blocks yourself, ask the agent.
- Open Career Page, select Versions, then select Edit on the version.
- Write what you want in Ask the agent to change anything..., or pick a suggestion such as Edit hero copy, Add testimonials or Colors.
- The agent explains its change in the chat, and the builder shows it on the canvas as a Draft from the agent, with the pages it changes.
- Select Commit to save the change to the page, or Discard to delete it. You can also ask the agent in the chat to commit it.
Nothing changes on the page until you commit. If you ask for more changes, the agent updates the same draft and the canvas shows the new version. A draft waits until you review it: when you come back to the chat later, the builder shows it again.
Translating a version
A version is written in one language, its source language, and can be served in more. Each version has its own translations.
- Open Career Page and select Versions.
- Select Translations on the version. On the published version they open read-only: translate a draft, then publish it.
- Select Add locale next to the search and pick a language. It gets a column in the table.
- Fill in the column, or select Translate on it to fill every text that has no translation yet with AI. To redo a language, including your own texts, select Clear all in the column's menu, then Translate.
With more than two languages, the table shows two columns at a time. Show instead and Hide column in a column's menu change which ones; Add locale lists the hidden languages too.
Visitors pick a language with the Language Switcher block. It shows the version's languages by name, each written in its own language, and marks the one being read. The page remembers the visitor's choice.
The table lists every text on the page in reading order: headings, buttons, menu items, image descriptions, form placeholders, the page title and description, and the fallbacks for job details. Translations save on their own as you type; Save saves at once. The filters next to the search narrow the table by Status (untranslated, translated, or needing a fix), by Language (which columns the status looks at) and by Content (texts with variables, or plain text). Each column header shows how many texts that language has translated.
Every language lists every published job opening. Job openings, departments and locations have their own languages and translations; see Translating a job opening. An untranslated text shows in its own language, as do the company description under each job and the type, education and level labels.
{{ and }} are filled in on the page, such as a job title. Copy
them into the translation exactly as they are, or the translation cannot be
saved./en/ while English is added.A published version's translations cannot be changed. Unpublish it, or create a new version, which copies them.
Publishing a version
To put a version in front of visitors, publish it.
- Open Career Page and select Versions.
- Select Publish on the version.
- Confirm on Publish Career Page.
The version now reads Published, and visitors see it.
Setting up your domains
Every company starts with one managed domain: the domain picked when the company was created, active from the start. To show the page on your own web address instead, add a domain, verify it and activate it. You can add as many domains as you need, but only one is active: that is the one your career page is shown on.
Adding a managed domain
A managed domain is one name under a domain we run, such as
yourcompany.directapply.work. There is nothing to configure: it is verified
on its own, normally within two minutes, and it can be activated before that
check has landed.
- Open Career Page and select Domains.
- Select Add domain.
- On Type, pick Managed domain and select Next.
- On Domain, fill in the name (letters, digits and hyphens) and select Next. The domain is added and its check starts.
- On Setup, watch it pass Routed to us and Verified, then select Done. You can close the dialog earlier and follow it in the list instead.
Names are first come, first served. A managed domain reads Managed in the list and has no DNS records.
Adding a custom domain
- Open Career Page and select Domains.
- Select Add domain.
- On Type, pick Custom domain and select Next.
- On Domain, fill in the subdomain, such as
careers.example.com, and select Next. The domain is added to the list at this point. - On DNS records, add the CNAME record shown, pointing your subdomain
at
host.applyfin.com, and the TXT record shown, onverify.plus your subdomain, containing the verification token. Select Done. - Once the records have propagated, select Verify on the domain in the list. DNS records on its row shows the records again at any time.
The dialog does not start the check itself: DNS changes take a while to propagate, and a check run too early fails.
Verifying a domain
Verification runs in the background; the row follows it for a few minutes (Pending, Proxied, then Verified), or reads Failed with the reason on the row. Fix the records (DNS records on the row shows them again, with the verification state underneath) and select Verify to try again.
Activating a domain
- Select Activate on a verified domain, or on a managed domain.
- Confirm.
The domain reads Active, moves to the top of the list and the setup panel counts it as done. Publish a version to go live on it.
To take the domain out of service without replacing it, select Deactivate on it and confirm. To run the DNS check again on a verified domain, select Re-verify on it.
When your career page is down
Applyfin checks your career page every 5 minutes. When a check fails, a red error mark appears next to Career Page in the left sidebar. Hover it to see what is wrong, when it was last checked and what you can do about it. Select a problem to open it: a domain problem opens the Domains tab, a page problem opens that version.
There are two kinds of problem:
- Unreachable: the domain does not answer at all, for example because its certificate is not valid or its DNS record no longer points to Applyfin. The same error shows in the header of the Career Page screen and on the domain's row.
- Pages that do not load: one or more pages answer with an error. All of them show as one problem.
Admins and owners also get a notification when the problem starts and when it is fixed. HR managers see the mark in the sidebar, but get no notification.